It’s safe to say that any opportunity to automate a report (that’s been qualified and checked for accuracy - remember that stat? 88% of excel reports out there have mistakes!) is an opportunity I always pounce on. The scheduler allows you to automate the running of a report on a particular frequency that you specifiy, and to email it to who you want. Advanced users can also make reports conditionally email given the resulting output of the report but we’ll save that for another post. For now, let’s explore how you use Jet Scheduler.
The Jet Scheduler is a powerful tool that allows you to schedule reports to be automatically run by the Windows Task Scheduler. You can also control where the output file is saved, if the report should be emailed once it has been generated, and the output format of the report.
Creating a Scheduled Task
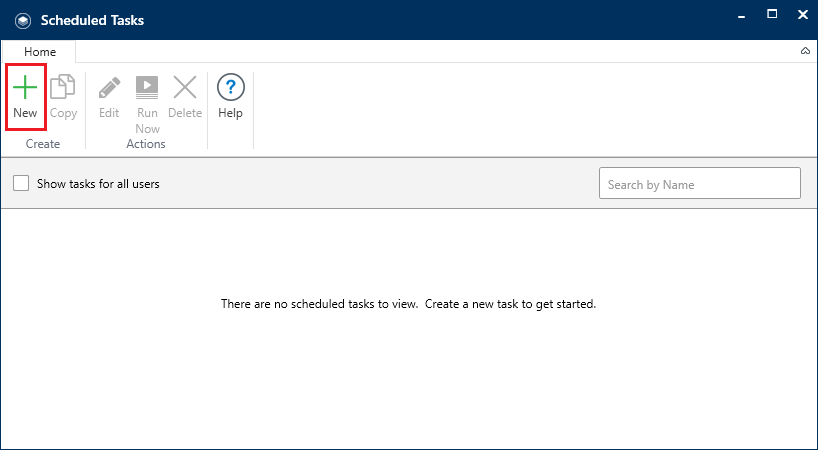
In the Jet ribbon in Excel, clik the Schedule.

Click the New button
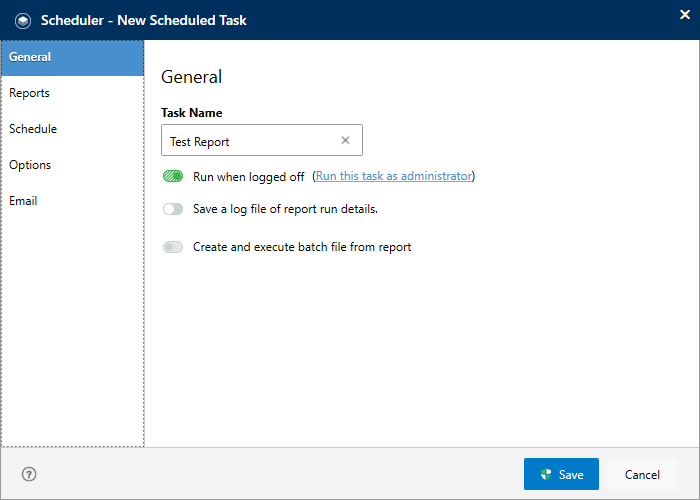
1. General Tab
This opens the New Scheduled Task which essentially is a wizard that we will now step through to build our scheduled task. The first tab is General, this is where we can choose the specific name of the task (to identify it at a later date when we look at the scheduler) and gives us the option to choose whether this task can run when you are logged off. We can also select to have a ‘run log’, which is a simple .txt output of the running process. This is a good option to troubleshoot errors with the process if you have issues with it running.
2. Reports
The next tab is Reports where we provide the location of the report, where we want the output file to be saved, and the format we’d like it saved as. Be careful when choosing PDF - you’ll need to ensure that your report fits within the page breaks in Excel first, otherwise you might find that your nice looking report in Excel is now spread over multiple pages due to page breaks. I have reports that run and I use the output as a data source for work in Power BI so .csv is a good option here as it tends to be a much smaller file size thatn .xlsx

Here’s a list describing the various file types:
- Jet Workbook: This will save the report as a normal Excel file with all Jet functionality intact, just like the input file.
- PDF: This will save the report as a PDF file (if your version of Excel supports that ability but be careful of page breaks!)
- Values Only Workbook: This will save the report as an Excel file with all Jet Reports functions removed. Therefore, this can’t be refreshed itself due to stripping out Jet functions.
- CSV: Removes all Jet functions, deletes all hidden rows, columns, and sheets, and saves the workbook .csv file .
- TXT: Much like the .csv, it removes all Jet functionality and deletes all hidden rows, columns, and sheets.
- Web Page: Saves the report as a .html file with a single sheet. This deletes all hidden rows, columns, and sheets.
- Web Page by Sheet: Saves the report as a .html file with a multiple sheets embedded in it. This is used when there are multiple sheets in the report.
3. Schedule
The next tab is Schedule where we can choose the frequency of the report running.
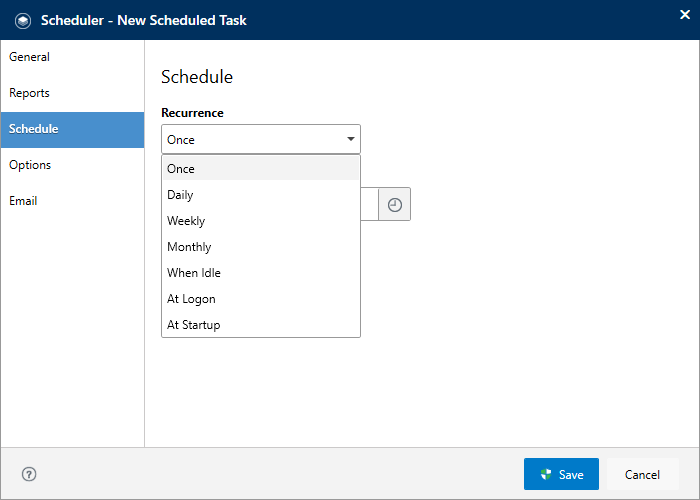
The options that you have available here are:
- Once: The report will only run… once (who knew!?).
- Daily: The report will be run every day (you get the option to set the number of days between each run on the next tab).
- Weekly: The report will be run every day (you get the option to set the number of days between each run on the next tab).
- Monthly: The report will be run every day (you get the option to set the number of days between each run on the next tab).
- When Idle: The report will be run every time the computer is in idle mode.
- At Startup: The report will be run every time that the computer is turned on and goes through its startup of programs & services.
- At Logon: The report will be run every time that you log on to the computer.
Dependant on the selection you make in the recurrence option, the frequency options differ. These are:
- Date: This is the first date that the report will run
- Time: This is the time of the day when the report will for this and subsequent schedules.
- Weeks between report runs: This specifies the number of weeks the Scheduler will wait between report runs before running the report again.
- Days: This is the days in a week that the report is scheduled to run on.
Note: If you can’t get the right combination you’re after, you can set up ANOTHER schedule with the same input & output files and set up a differing schedule that way.
4. Email
The next tab is the email setup options.

There are two methods that you can set up emails and this is either using Outlook natively in the logged in computer, or by SMTP server settings. Outlook is an easy method but relies on Outlook being active and running on the computer. The better method for email setup is by SMTP. To do this, you ned to set up the SMTP server settings which is within Application Settings in the Jet ribbon.
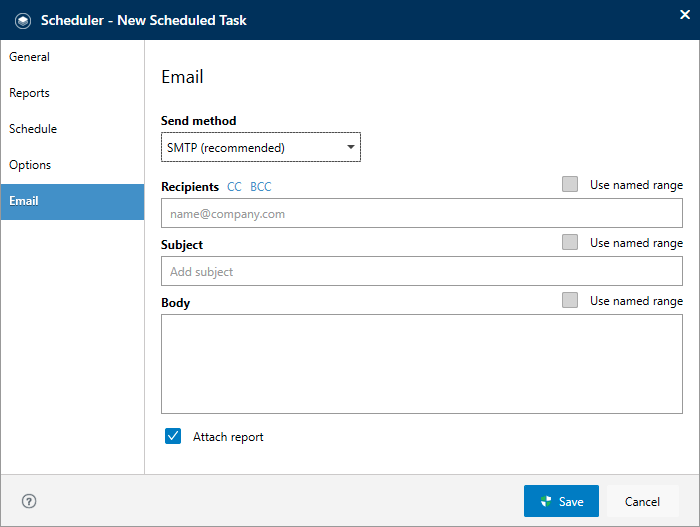
- Recipients: Email addresses will be entered here for all recipients of the report. Email addresses should be separated by a semi-colon, much like when composing mails in Outlook.
- Subject: This allows you to give a custom subject to be sent as part of the email.
- Body: This allows you to specify a custom body to be sent as part of the email.
- Attach report: If this box is checked the report will be attached to the email. If the box is unchecked the report will not be attached. This can be used as a type of notification when used in conjunction with the subject and body of the email to allow a user to know that the report has been run
Use Excel named ranges!
The best method of filling in the Recipients, Subject, and Body is by having named ranged set up in the report. This is cleaner, allows you to have dynamic text for the subject and body, and allows other users who can access the original report, to change the recipient list. In addition to this, it allows you to utilise conditional IF statements which we’ll explore and example of in another article. Essentially, we can fill the list of emails in an ‘emaillist’ named range if another criteria is satisfied.
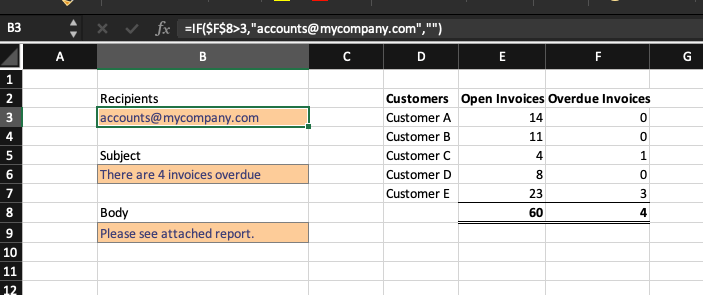
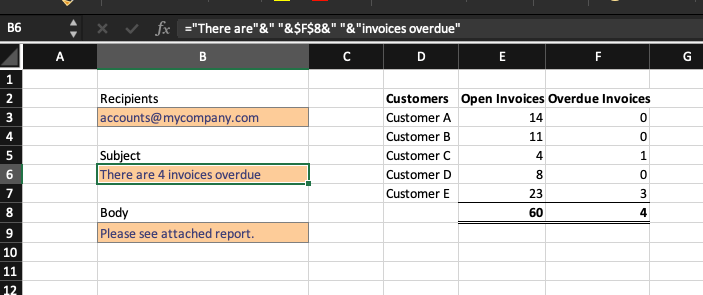
The above shows that the email recipient cell would b blank if there were less than 3 invoices overdue. Additionally, the subject can be dynamically driven too.
Once set up, on the Email tab of the Jet Scheduler, click the checkbox next to Use named range and select the appropriate named ranges. I tend to set these as emaillist, emailsubject, and emailbody. This can can be placed on to a hidden worksheet (you can hide worksheets by putting AUTO+HIDESHEET+VALUES into cell A1)
❤️ Enjoyed this article?
Forward to a friend and let them know where they can subscribe (hint: it's here).