
Imagine a scenario where you’re tasked with analysing sales data for the prior two years, but you’ve been given the information in 24 separate Excel documents. What do you do? Most people would open a blank file (or maybe the first file) and copy/paste the second file at the bottom. Then open the third file and copy/paste this at the bottom. Rinse and repeat until all the data is in one file (let’s hope you didn’t make a mistake!). Others may use fancy formulas, but if not careful, these are prone to errors (as the statistic goes, 88% of Excel spreadsheets have errors).
This is where Power Query comes to the rescue.
What is Power Query?
Microsoft’s Data Connectivity and Data Preparation technology that lets you seamlessly access data stored in hundreds of sources and reshape it to fit your needs—all with an easy to use, engaging, no-code experience.
Example Files
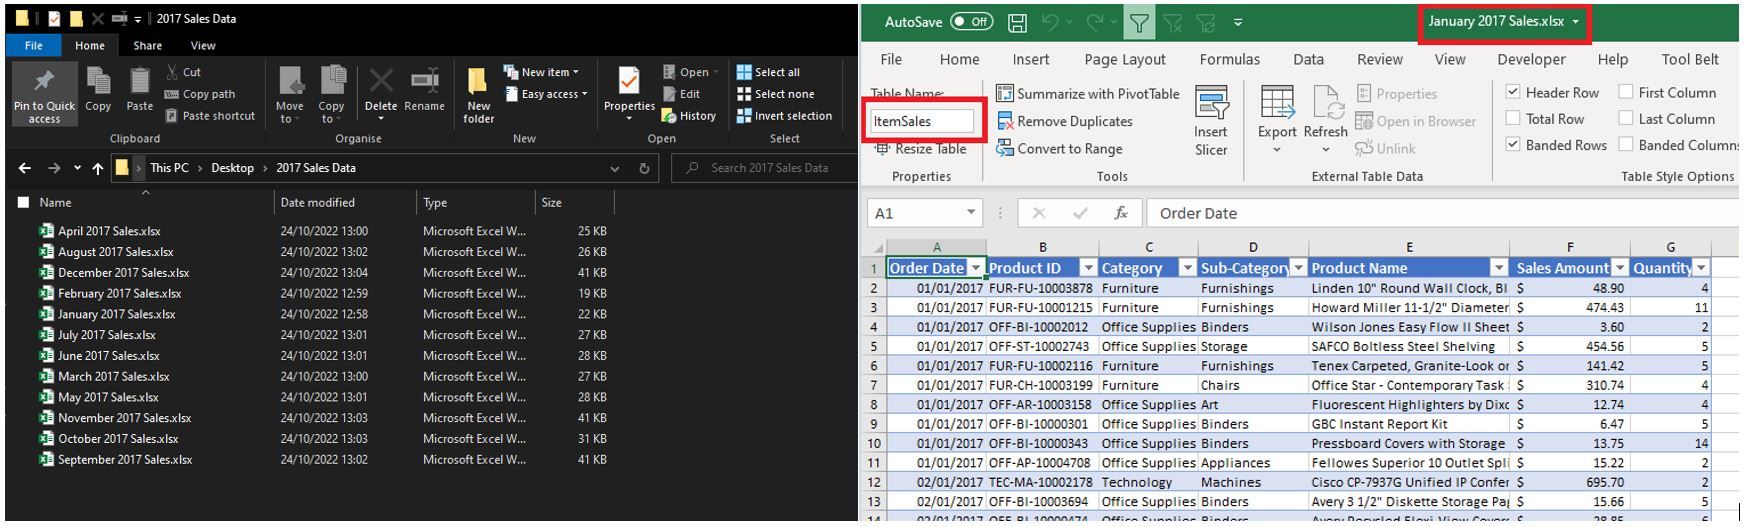
For this article, I have made 12 example files for sales data for each month in 2017. Below is a screenshot of the ‘January 2017’ sales file. You’ll notice the data is stored as an Excel table (’ItemSales’) - this is quite standard and represents a typical data extraction from a typical ERP.
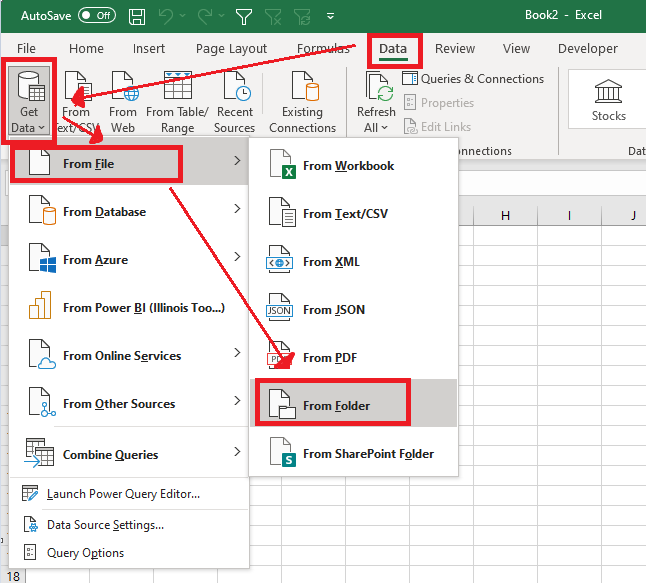
Step 1 - Import Files from a Folder
Firstly, open an empty Excel file. Then go to the Data tab and click on Get Data → From File → From Folder
Select the folder and Excel will open the following window which shows the available files that Excel can see:
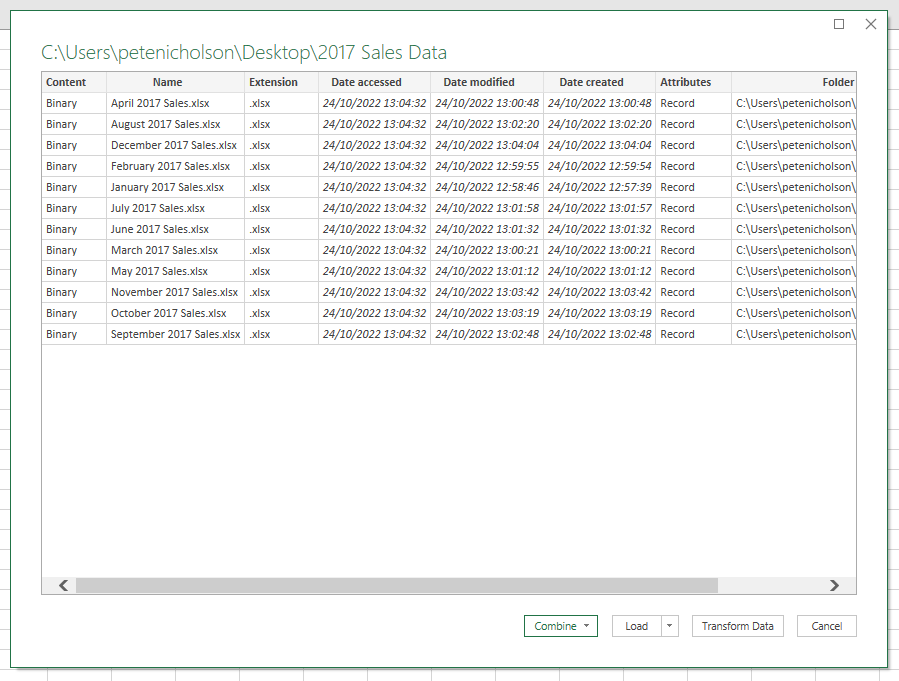
There are 3 options shown in this window:
- Combine: This option can be used if you know that that ALL files are uniform and no edits are needed. This option isn’t recommended as it gives no control over checking the data (something that is important to do to maintain data acurracy and integrity).
- Load: This option simply loads the above screenshot as a table in Excel rather than the actual data so we don’t want to do that
- Transform Data: This option opens a new window showing the files from the folder, and gives us the opportunity to check and make any edits that we may need to do before we combine the data.
We want to click on Transform Data. When you click on that, you will be presented with the below window.
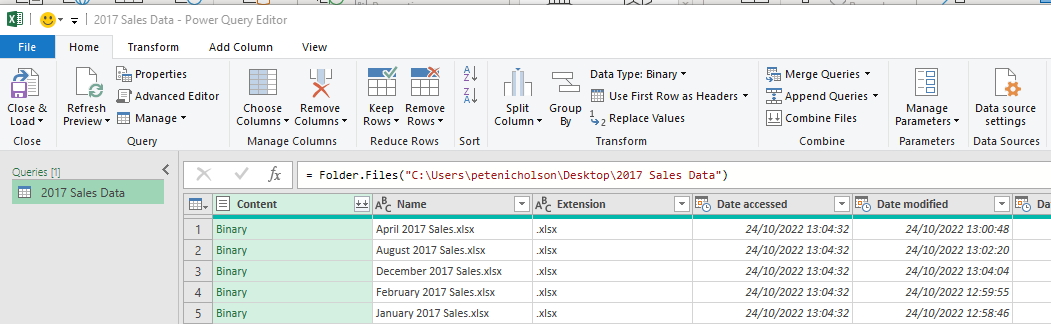
The first thing that we want to do is to filter to only the files that we need. This helps to ensure we’re only pulling in the intended files as well as future-proofing this file. Someone else may have access to the folder and put other files in there that we do not want Excel to see. Additionally, the source folder may contain temporary files (.tmp) that we want Power Query to ignore.
Click the drop-down arrow next to the column Extension -> go to Text Filters -> Equals and put in the format of your sales files. In this example, it’s .xlsx
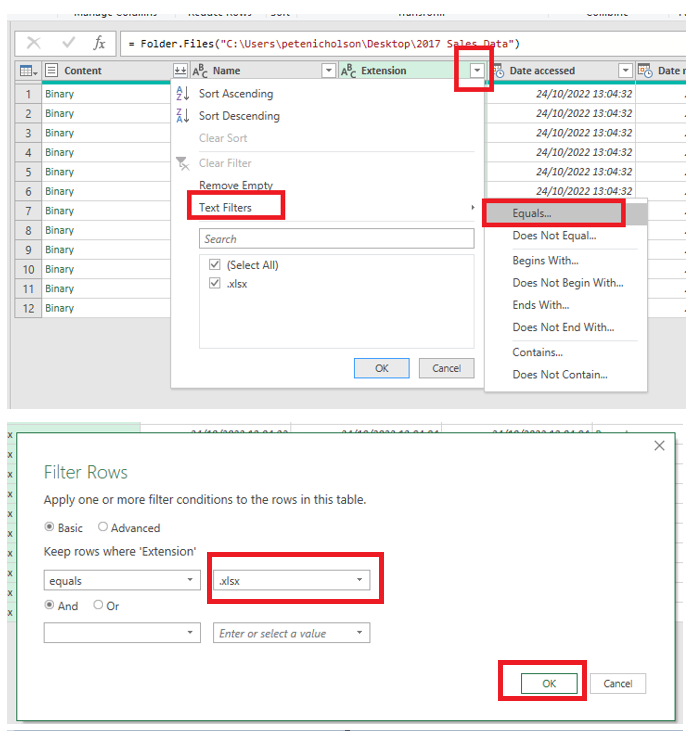
Tip: Someone may put a .xlsx file in this folder at a later date which, at the moment, would also get included in this. You may need to specify the text filter a little further. An idea for this example is the add a text filter on the ‘Name’ column to where it includes the text ‘2017 Sales’.
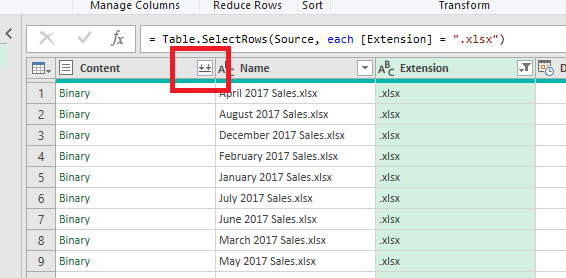
Currently, the table only shows the files to consolidate. We can now instruct Power Query what data to combine from the files. To do this. press the two arrows in the column “Content”.
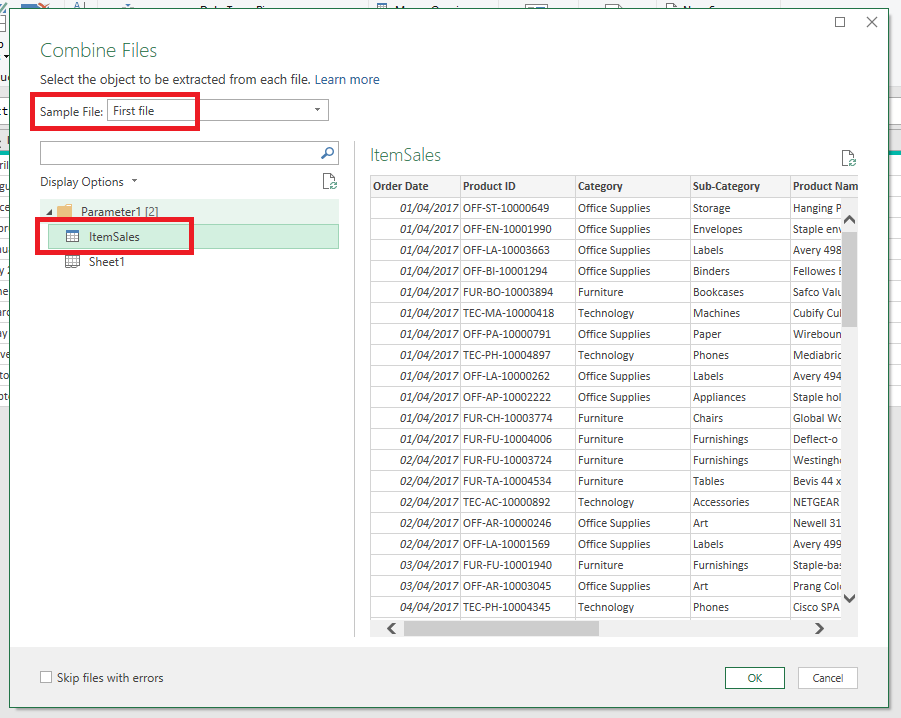
This will open the following screen where we can select the sales table. By default, Power Query shows us an example of the data on the right-hand side with the sample being taken from the first file in the folder (we can choose any file we’ve selected if we’d prefer to see the sample on a specific file):
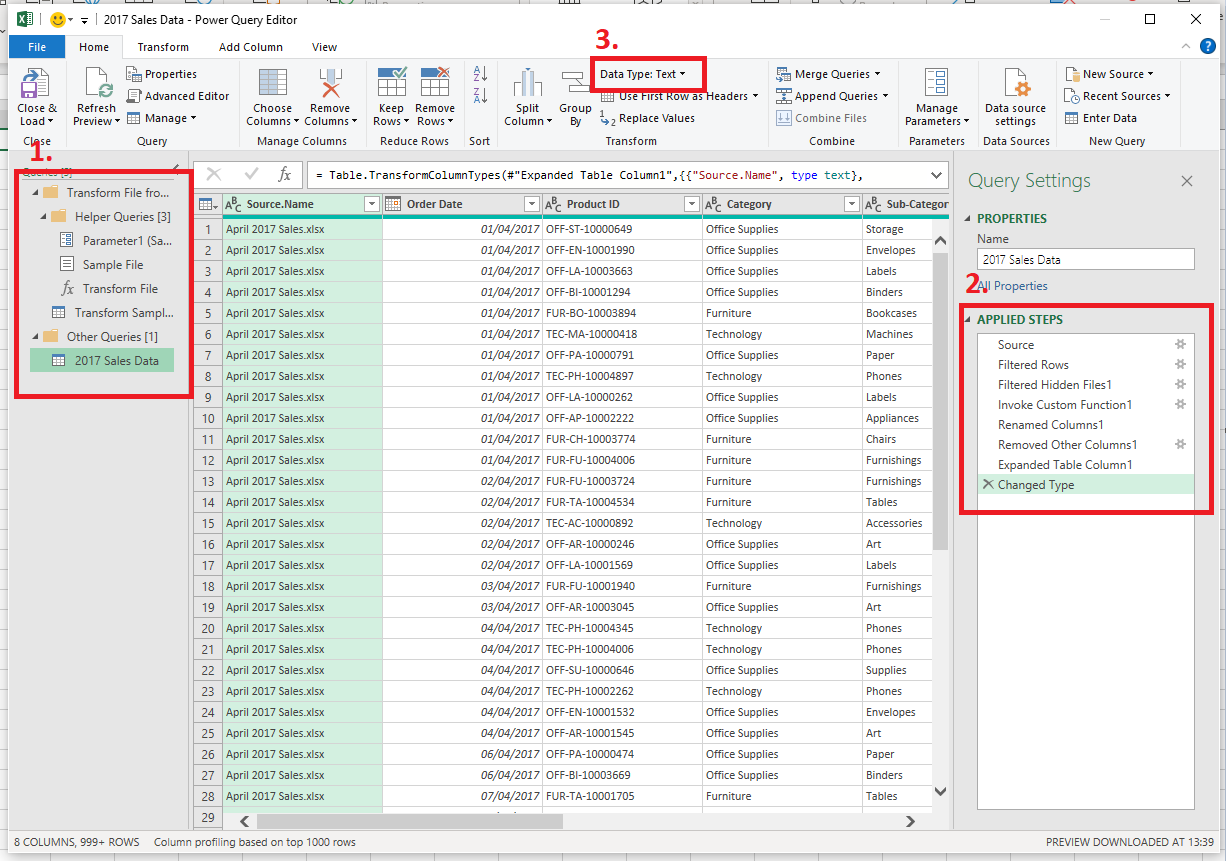
The table below shows that Power Query has now combined all the files from that folder:
- Don’t worry too much about these queries as we won’t go too in depth into these. (If you do want a further explanation it can be found at the bottom of this post)
- This shows the steps that Power Query has applied
- We can now go through each column and ensure that the Data Type is correct for the data in question (ie. Dates are of date type, sales value is of currency type, etc)
We can now click Close & Load at the top left which will bring us back to our Excel workbook with all the data from the files combined into one table.
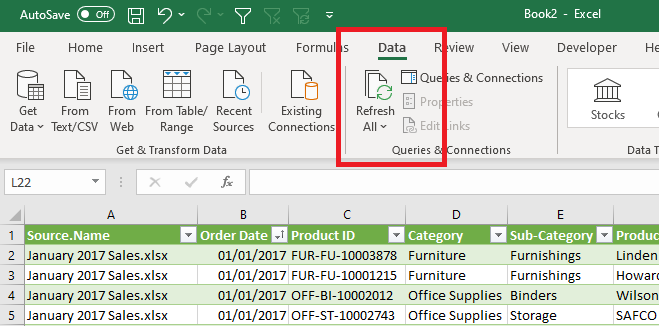
And that’s it! We’ve successfully combined the files into one table. Not only that, when the next month’s sales data gets dropped into the folder, we can simply click on Data → Refresh All and Power Query will detect the new sales file(s) and update our table with the new data.
Footnotes:
What’s going on with all these queries?
- Parameter1 – A parameter to hold the file name of the selected sample file.
- Sample File – A file object of the selected sample file.
- Transform File – A custom function applied to every file in the folder. The steps in the function are based on the Transform Sample File query.
- Transform Sample File – A query that contains the transformations applied to Sample File. Forms the basis of the Transform File custom function.
- ‘Other Queries’ Folder (or whatever yours is called) – This is the final query with all the files stacked together.
❤️ Enjoyed this article?
Forward to a friend and let them know where they can subscribe (hint: it's here).